apkarian100
Vendor
So you noticed that the 08+ STI and 11+ WRX front bumpers have sweet bumper vents, and you think to yourself, "maybe I can put them on my car?" Well here's a write-up on how to install them.
Tools/Supplies:
First step, acquire some bumper vents. They are around $32 a piece from the Subaru dealer, cheaper if you have a discount. They come unpainted, so do with them how you please; paint, wrap, etc.

Next, find yourself a 08+ STI or 11+ WRX, pop one vent out, and make a template. I used cardboard, put it behind the bumper opening for the vent, and traced the outline with a sharpie.
Then I took a dremel (scissors work too) and cut out the shape. I cut the template a little wider than the outline and then test fit it to the vent opening. Then I cut it down more and more till it was perfect.

Next, take a tape measure, and measure the distance the opening is relative to the edges of the bumper. I have a 2008 Impreza 2.5i and the bumper body lines are in the exact same spots as a 08+ STI or 11+ WRX. I made measurements from the fender arches and where the bumper meets up with the fender. Record the measurement on your template.
Now you need to place the template on your bumper. I found it easier to do this step with the bumper off the car, but if you aren't comfortable with taking it off, you can leave the bumper on.
You now need to tape the template onto your bumper. This is where those measurements come in handy. Place the template on the bumper and measure the location it needs to go. Once you have it in the right spot, tape it down.


Recheck your measurement to make sure the template is spot on. Next, take your sharpie and trace around the template onto the bumper. It should come out looking like this:


Take the template off, and draw the lines you couldn't draw where the tape was over the bumper.
Now you need to cut out the section of your bumper you just traced. Place clear tape over the sharpie outline. This will prevent the paint from splintering.
A dremel works great for cutting out the bumper. I noticed as soon as I started cutting, the dremel was sliding very easy on the smooth bumper. I recommend for the first time around, very lightly score the sharpie outline with your dremel.
On the second time around, cut right through the plastic. Take your time. You are going to have hot pieces of plastic flying everywhere. and it might clog up your dremel if you go too fast.
After you go around with your dremel for a second time, use you dremel for the last time and cut any remaining spots of the outline being held on by the bumper. You'll finally get to a point where you can push the cut piece right out of the bumper.

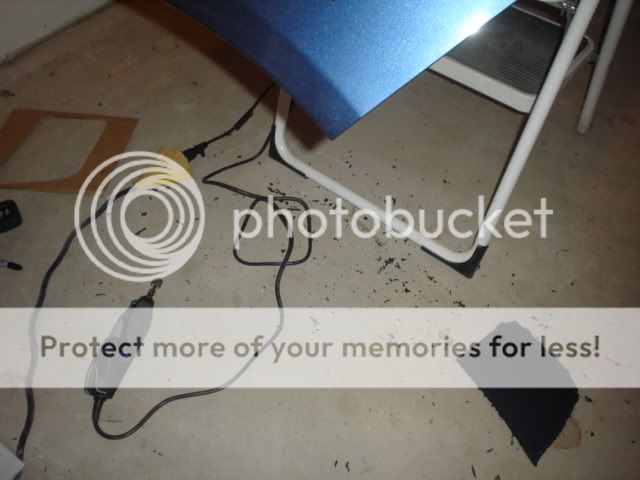
Notice all the nice plastic bits everywhere:
You'll now notice the outline on your bumper has a ton of rough edges and plastic bits hanging off it. I first recommend you pull off all the pieces you can by hand.
Next, put a sanding bit on your dremel and go to town making the outline smooth. You really need to have patience and be steady when sanding. If you sand off too much, the bumper vents won't cover the nice new hole you made.
I got the bumper to this point and called it good:

Now go and test fit those bumper vents. They should just snap in and fit pretty snug in. If you're forcing the vents in, you need to trim the bumper more. See where the vent is hitting and sand that lightly.
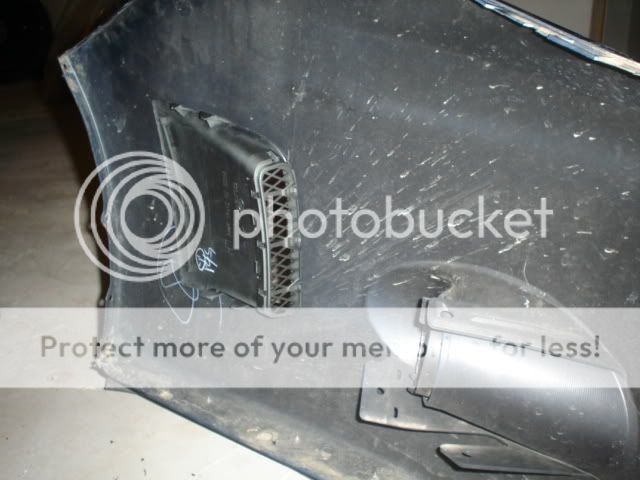
If the vents fit in nicely, they should look like this on the backside:

One thing to note, the bumpers the vents originally go in have a dedicated mounting system on the bumper, that you won't have. The top and bottom clips on the vents hold them in the bumper decently, but I wouldn't trust them to stay with just that. I recommend laying a bead of silicone or double sided tape around the lip of the bumper vent.
The final product of all your hard work should look somewhat like this:


So there you go, you have bumper vents on your front bumper now!
Tools/Supplies:
- Masking tape
- Dremel w/cutoff wheel and sanding bit
- Sharpie
- Tape measure
- Clear tape
- Bumper vents: LH: 57739FG020 RH: 57739FG010
- Cardboard
- A friend or buddy with a 08+ STI or 11+ WRX
First step, acquire some bumper vents. They are around $32 a piece from the Subaru dealer, cheaper if you have a discount. They come unpainted, so do with them how you please; paint, wrap, etc.
Next, find yourself a 08+ STI or 11+ WRX, pop one vent out, and make a template. I used cardboard, put it behind the bumper opening for the vent, and traced the outline with a sharpie.
Then I took a dremel (scissors work too) and cut out the shape. I cut the template a little wider than the outline and then test fit it to the vent opening. Then I cut it down more and more till it was perfect.
Next, take a tape measure, and measure the distance the opening is relative to the edges of the bumper. I have a 2008 Impreza 2.5i and the bumper body lines are in the exact same spots as a 08+ STI or 11+ WRX. I made measurements from the fender arches and where the bumper meets up with the fender. Record the measurement on your template.
Now you need to place the template on your bumper. I found it easier to do this step with the bumper off the car, but if you aren't comfortable with taking it off, you can leave the bumper on.
You now need to tape the template onto your bumper. This is where those measurements come in handy. Place the template on the bumper and measure the location it needs to go. Once you have it in the right spot, tape it down.
Recheck your measurement to make sure the template is spot on. Next, take your sharpie and trace around the template onto the bumper. It should come out looking like this:
Take the template off, and draw the lines you couldn't draw where the tape was over the bumper.
Now you need to cut out the section of your bumper you just traced. Place clear tape over the sharpie outline. This will prevent the paint from splintering.
A dremel works great for cutting out the bumper. I noticed as soon as I started cutting, the dremel was sliding very easy on the smooth bumper. I recommend for the first time around, very lightly score the sharpie outline with your dremel.
On the second time around, cut right through the plastic. Take your time. You are going to have hot pieces of plastic flying everywhere. and it might clog up your dremel if you go too fast.
After you go around with your dremel for a second time, use you dremel for the last time and cut any remaining spots of the outline being held on by the bumper. You'll finally get to a point where you can push the cut piece right out of the bumper.
Notice all the nice plastic bits everywhere:
You'll now notice the outline on your bumper has a ton of rough edges and plastic bits hanging off it. I first recommend you pull off all the pieces you can by hand.
Next, put a sanding bit on your dremel and go to town making the outline smooth. You really need to have patience and be steady when sanding. If you sand off too much, the bumper vents won't cover the nice new hole you made.
I got the bumper to this point and called it good:
Now go and test fit those bumper vents. They should just snap in and fit pretty snug in. If you're forcing the vents in, you need to trim the bumper more. See where the vent is hitting and sand that lightly.
If the vents fit in nicely, they should look like this on the backside:
One thing to note, the bumpers the vents originally go in have a dedicated mounting system on the bumper, that you won't have. The top and bottom clips on the vents hold them in the bumper decently, but I wouldn't trust them to stay with just that. I recommend laying a bead of silicone or double sided tape around the lip of the bumper vent.
The final product of all your hard work should look somewhat like this:
So there you go, you have bumper vents on your front bumper now!
Last edited by a moderator:

