New Project - '71 Datsun 240z

2point5RS_Dan

HATER DAN
From the grave!

Glad you were able to get the rest of the bolts out of the block. I HATE rounding off or breaking bolts/screws, done it on both my car and my atv.


Apollyon12

Active member
The same day as the temp housing, I was able to take out the entire heating system along with the heater core. As I am doing yoga under the dash trying to get to all the bolts, I noticed that the wire cable that goes to the heater core water control valve is broken off, and the valve is VERY stiff.

OK, I think I know what happend...

I finish taking all the pieces out and I find that there is still dirty, rusty water inside the core. Contrary to what you might think at first, this made me very happy.

I am guessing here but is seems to me that as the car aged, the control valve got corroded and finally it took so much force to move the control lever that the wire either broke or pulled out. This would mean that the heat was probably always on and "couldn't" be shut off (ignore the fact that if you stick you head down in the foo well you can see the valve and operate it with you hand), and because, most likely, this was a summer only car, the PO decided to just cut the heater core out of the system rather than fix it properly. This means that the heater core was most likely still good and not in need of a replacement. The dirty water pretty much told me the same thing. But I took it to a radiator shop and for $10 had it pressure tested. That means I "saved" the $100+ for a new one.

 
Last edited by a moderator:

Apollyon12

Active member
That same shop was also able to tell me that I don't really need to worry about the radiator, it's a little beat up but there is no sign of rot or corrosion that they could see. Run it till it fails, which won't be any time soon.

Sweet, another $300 "saved".

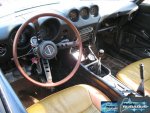
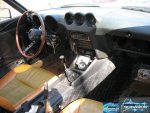
After getting the heating ducts cleaned and new seal material put in I got it back in and sorted out the mess of an electrical system. I also took off the crappy dash cover. You can see the giant splits in the dash, but I would rather have them as a reminder to fix the dash sometime soon, than the plastic cap that was on there.

View attachment 2910 View attachment 2911

As you can see, I have also changed the steering wheel for the 240SX (?) wheel, that was in the car when I got it, to an original pressed leather wheel. And the guy I got the car from had also sourced a set of original butterscotch seats. Much nicer. Though I would prefer that they where the corcect black seats, but hey they where "free". Racing seats are going to go in eventually so not having the correct color isn't a big deal. I am not building a concourse car anyway.

4-3-10 (12)..jpg

4-3-10 (14)..jpg

 
Last edited by a moderator:

Apollyon12

Active member
This last weekend, I recieved the poly bushing kit I have been waiting on and I decided to what the crap was up with the front suspension. When parked, the front wheels have an ENOURMOUS amount of static camber. (And now that I am thinking about it, I should have gotten a pic for posterities sake, but I didn't.) Along with that, whenever I hit a bump there would be a particularly loud bang. And at 60mph it felt a little darty, like it wanted to change direction easily. So I knew there was something worn up there.

So I get the car up on jackstands and this is what I notice first.

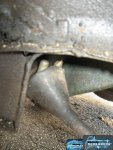
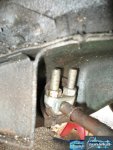
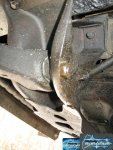
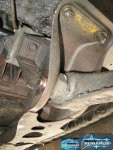
View attachment 2914 (Drivers side Tension/Compression Rod) OK, Looks normal.

View attachment 2912(Passenger side Tension/Compression Rod) BUT WHAT THE HELL IS THAT?

View attachment 2913(Passenger side, Cover removed)

The T/C Rods keep the wheel (whole hub/brake/strut assembly) from moving forward or backward. The PO thought it would be ok to use this cable clamp instead of buying the righ pieces. But unfortunately, this wasn't really the problem, it was actually working "fairly well", for a jerry rig.

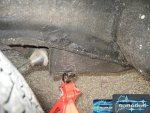
The real problem was that full metal camber bushings had been installed, apparently a LONG time ago.

The pics don't show much, except that there is a control arm and it's dirty, but you can see the hex of the camber bushing.

View attachment 2915 View attachment 2916

4-3-10 (20)..jpg

4-3-10 (10)..jpg

4-3-10 (3)..jpg

4-3-10 (6)..jpg

4-3-10 (22)..jpg


Apollyon12

Active member
Thankfully those bolts and the T/C rods all came out without too much effort and none got broken. I had originally hoped to install just the T/C rod bushings but because the control arm had already had the OEM bushing removed for the camber bushing, I could install those too. But sadly, because of the cable clamp, I don't have all the hardware for the T/C rods, so I had to order a new kit.

Which means, because (for each side) the two T/C rod nuts, and the bolt on the control arm are already removed, there is just three nuts on the tophat and the whole wheel assembly will fall right out (forgetting the tie-rod end and brake hose, of course).

But wouldn't it be a better idea to remove the control arm from the strut and pull the ball-joint/tie rod assembly, then drop out the strut/brakes?

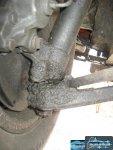
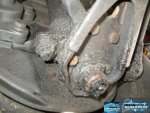
Maybe not when they look like this:

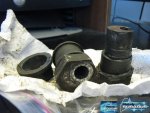
View attachment 2917 View attachment 2918

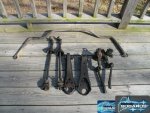
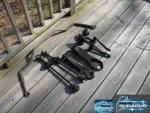
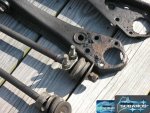
But I had to do it. The dust shields on both the tie-rod ends and the ball joints are gone and they all need to be replaced. This is one reason that there is so much crap in there. The grease just went everywhere. Also I want to sand-blast and repaint everything before it goes back in after the wheel bearings are replaced.

After much fighting, I did get everything out. I think the grease/dirt mix did a lot to prevent the bolts from all seizing up because none of these broke.

View attachment 2919 View attachment 2920 View attachment 2921

At the point these pics were taken the struts where still hanging in the car but I did get them out later. They are in the middle of bearing removal and genereal cleaning. Also in the pic is the 1" front sway bar. When removing that to replace the bushings and endlinks, I broke one of the bolts. Did I aready say that I hate rusty cars. Thankfully you don't need swaybars to drive and its a fairly easy fix to replace the sway bar mounts.
4-3-10 (7)..jpg

4-3-10 (8)..jpg

4-3-10 (17)..jpg

4-3-10 (19)..jpg

4-3-10 (18)..jpg

 
Last edited by a moderator:

Nate

Founding Father
Great way to catch this thread up! Really nice progression on this car. I bet you cant wait to get out and enjoy it.


Stein

Stein
I was just talking to my dad about Nissan/Datsun 2x0s for some reason. I like the 260z but he said it was too long and preferred the lines of the 240. I'm sure I'll feel differently once I see yours finished
default_additional_thumbsup.gif
.


Apollyon12

Active member
I was just talking to my dad about Nissan/Datsun 2x0s for some reason. I like the 260z but he said it was too long and preferred the lines of the 240. I'm sure I'll feel differently once I see yours finished
default_smile.png
.

All the Z cars had the exact same body, except for the 2+2's. The ZX's body had some major changes, including a different chassis for the 2+2's, I think, opposed to the slight modifications that they did to fit two extra seats into the Z's.
Are you sure that your dad isn't thinking of the ZX's as being the long ones? Although the 2+2's had a funky look too.

View attachment 2943 - 240z

View attachment 2945 - 280z

View attachment 2942 - 280z 2+2

View attachment 2944 - 280zx's

You can see the major difference in the two seat vs the 2+2 in the rear roof area. They had to make some head room for the passengers, I think.

Also notice the really small bumpers on the 240z vs the giant ones on the 280z. Basicaly other than that, they are the same car. Minor interior differences, and the motor, but that's really it. As opposed to the ZX's which where as different a car as an '07 wrx and an '08 are.

The 260z are kinda rare because they where only sold for one year in the US, 1974. I was told to steer clear of them because they had a touchy carb, thought that can be fixed with a Weber DGV swap like what is in mine.

 
Last edited by a moderator:

Smiththers

New member
little late to this thread, but im loving the car. ive always been a fan of the 70's - 80's Japanese sports cars


Apollyon12

Active member
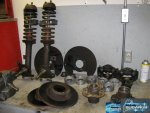
Well after a whole bunch of sand blasting and way too much paint fumes in my house, the front suspension is almost ready to go back in (And would be if not for the fact that it's raining this weekend).

View attachment 3023

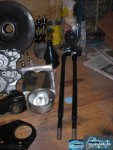
TC Rods and new front spherical bearing and rear poly bushings.

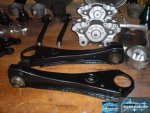
View attachment 3024 View attachment 3026

Control arms with new poly bushings to replace the badly worn camber bushings.

View attachment 3025

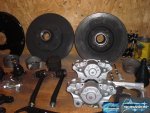
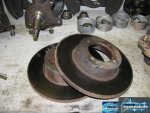
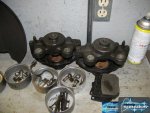
Brand new tie-rods and calipers. The OEM calipers are a two piston, non-floating design so both pistons need to move in order to apply equal pressure, but in each caliper, one piston was siezed up causing badly worn inside surfaces on the rotors. One piston was so seized, 125psi wouldn't even pop it out. Thankfully, reman calipers from Napa are only $40 so I just bought two to avoid having them seize up on me any time soon. That and the fact they came all ready for paint.

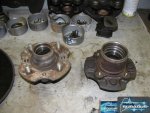
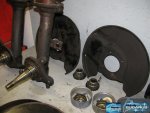
I got new races in the hubs and everything got a coat of grill paint. On monday, they are going to the machine shop to get turned.

View attachment 3027

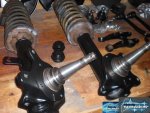
Shock tubes and spindle assemblys got some fresh paint as well as the bearing dust caps. Steering arms and new ball joints in the background. I only painted half of the shock tubes because eventually I am going to be doing a coil-over kit and I didn't want to dismantle the whole assembly at this point.

CIMG2008..jpg

CIMG2011..jpg

CIMG2010..jpg

IMG_0877..jpg

CIMG2013..jpg

 
Last edited by a moderator:

Apollyon12

Active member
Working a second job on the weekends is making it hard to find motivation to do anything but sit on the couch dificult, but this weekend I got the suspension back in.

View attachment 3227 View attachment 3228

Earlier this week I went to look at a '78 280z auto with the thought that if might be good for the wife. Unfortunately it was a NE car and was rusted about what you would expect. Battery tray and fender corners where gone, and almost everything underneath had surface rust. Didn't buy it, of course, but it did make me happy with the car I did buy. It's like the dirty and grim has protected most of the important stuff on the car.

5-16-10 (1)..jpg

5-16-10 (2)..jpg


Apollyon12

Active member
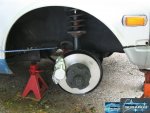
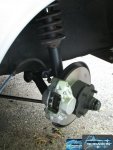
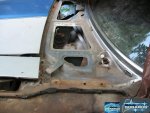
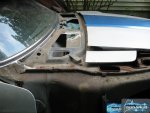
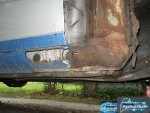
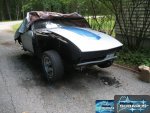
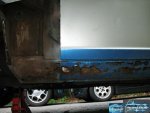
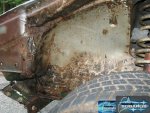
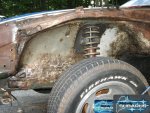
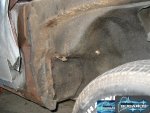
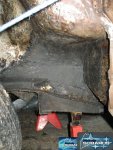
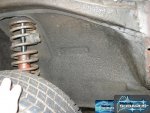
This project has ground to a halt. New job, different schedule have made it really hard for me to accomplish anything. Basicly all I ahve been able to do is remove the fenders to get to the wheel wells.

View attachment 4142 View attachment 4140 View attachment 4139

Remove as much rust from the rockers as I can.

View attachment 4141 View attachment 4143

I also have cut out the passenger side floor and started a remote battery installation, but I don't have any current pics.

I am considering the idea of trying to find a co-owner. Someone reasonably close to sanford that has a garage they are willing to let the car come and live in. Or I would be willing to rent space for a reasonable price.

What keeps me from doing any real work is having to move everything outside to work and then back inside when I am done. I really need to be able to walk away from the project and leave everything as it is, so I can come back later. That and the weather, finding a good day and motivation at the same time is almost impossible. In addition I have been seeing to many things that I really want to fix, in addition to the floors and rockers, that I am going to need to put this bad boy on a rottessery, or I am not going to be happy. That has really put the brakes on more than anything else.

On the up side, it seems I have found someone in Mass that is interested in having me repair their 280z's floors and frame rails. Thankfully theirs is not nearly as bad as mine and because it will be a couple weekend long project, I am going to be able to do it at my parents garage.

7-12-10 (10).jpg

7-12-10 (11).jpg

7-12-10 (6).jpg

7-12-10 (12).jpg

7-12-10 (9).jpg

 
Last edited by a moderator:

Latest posts

Back
Top